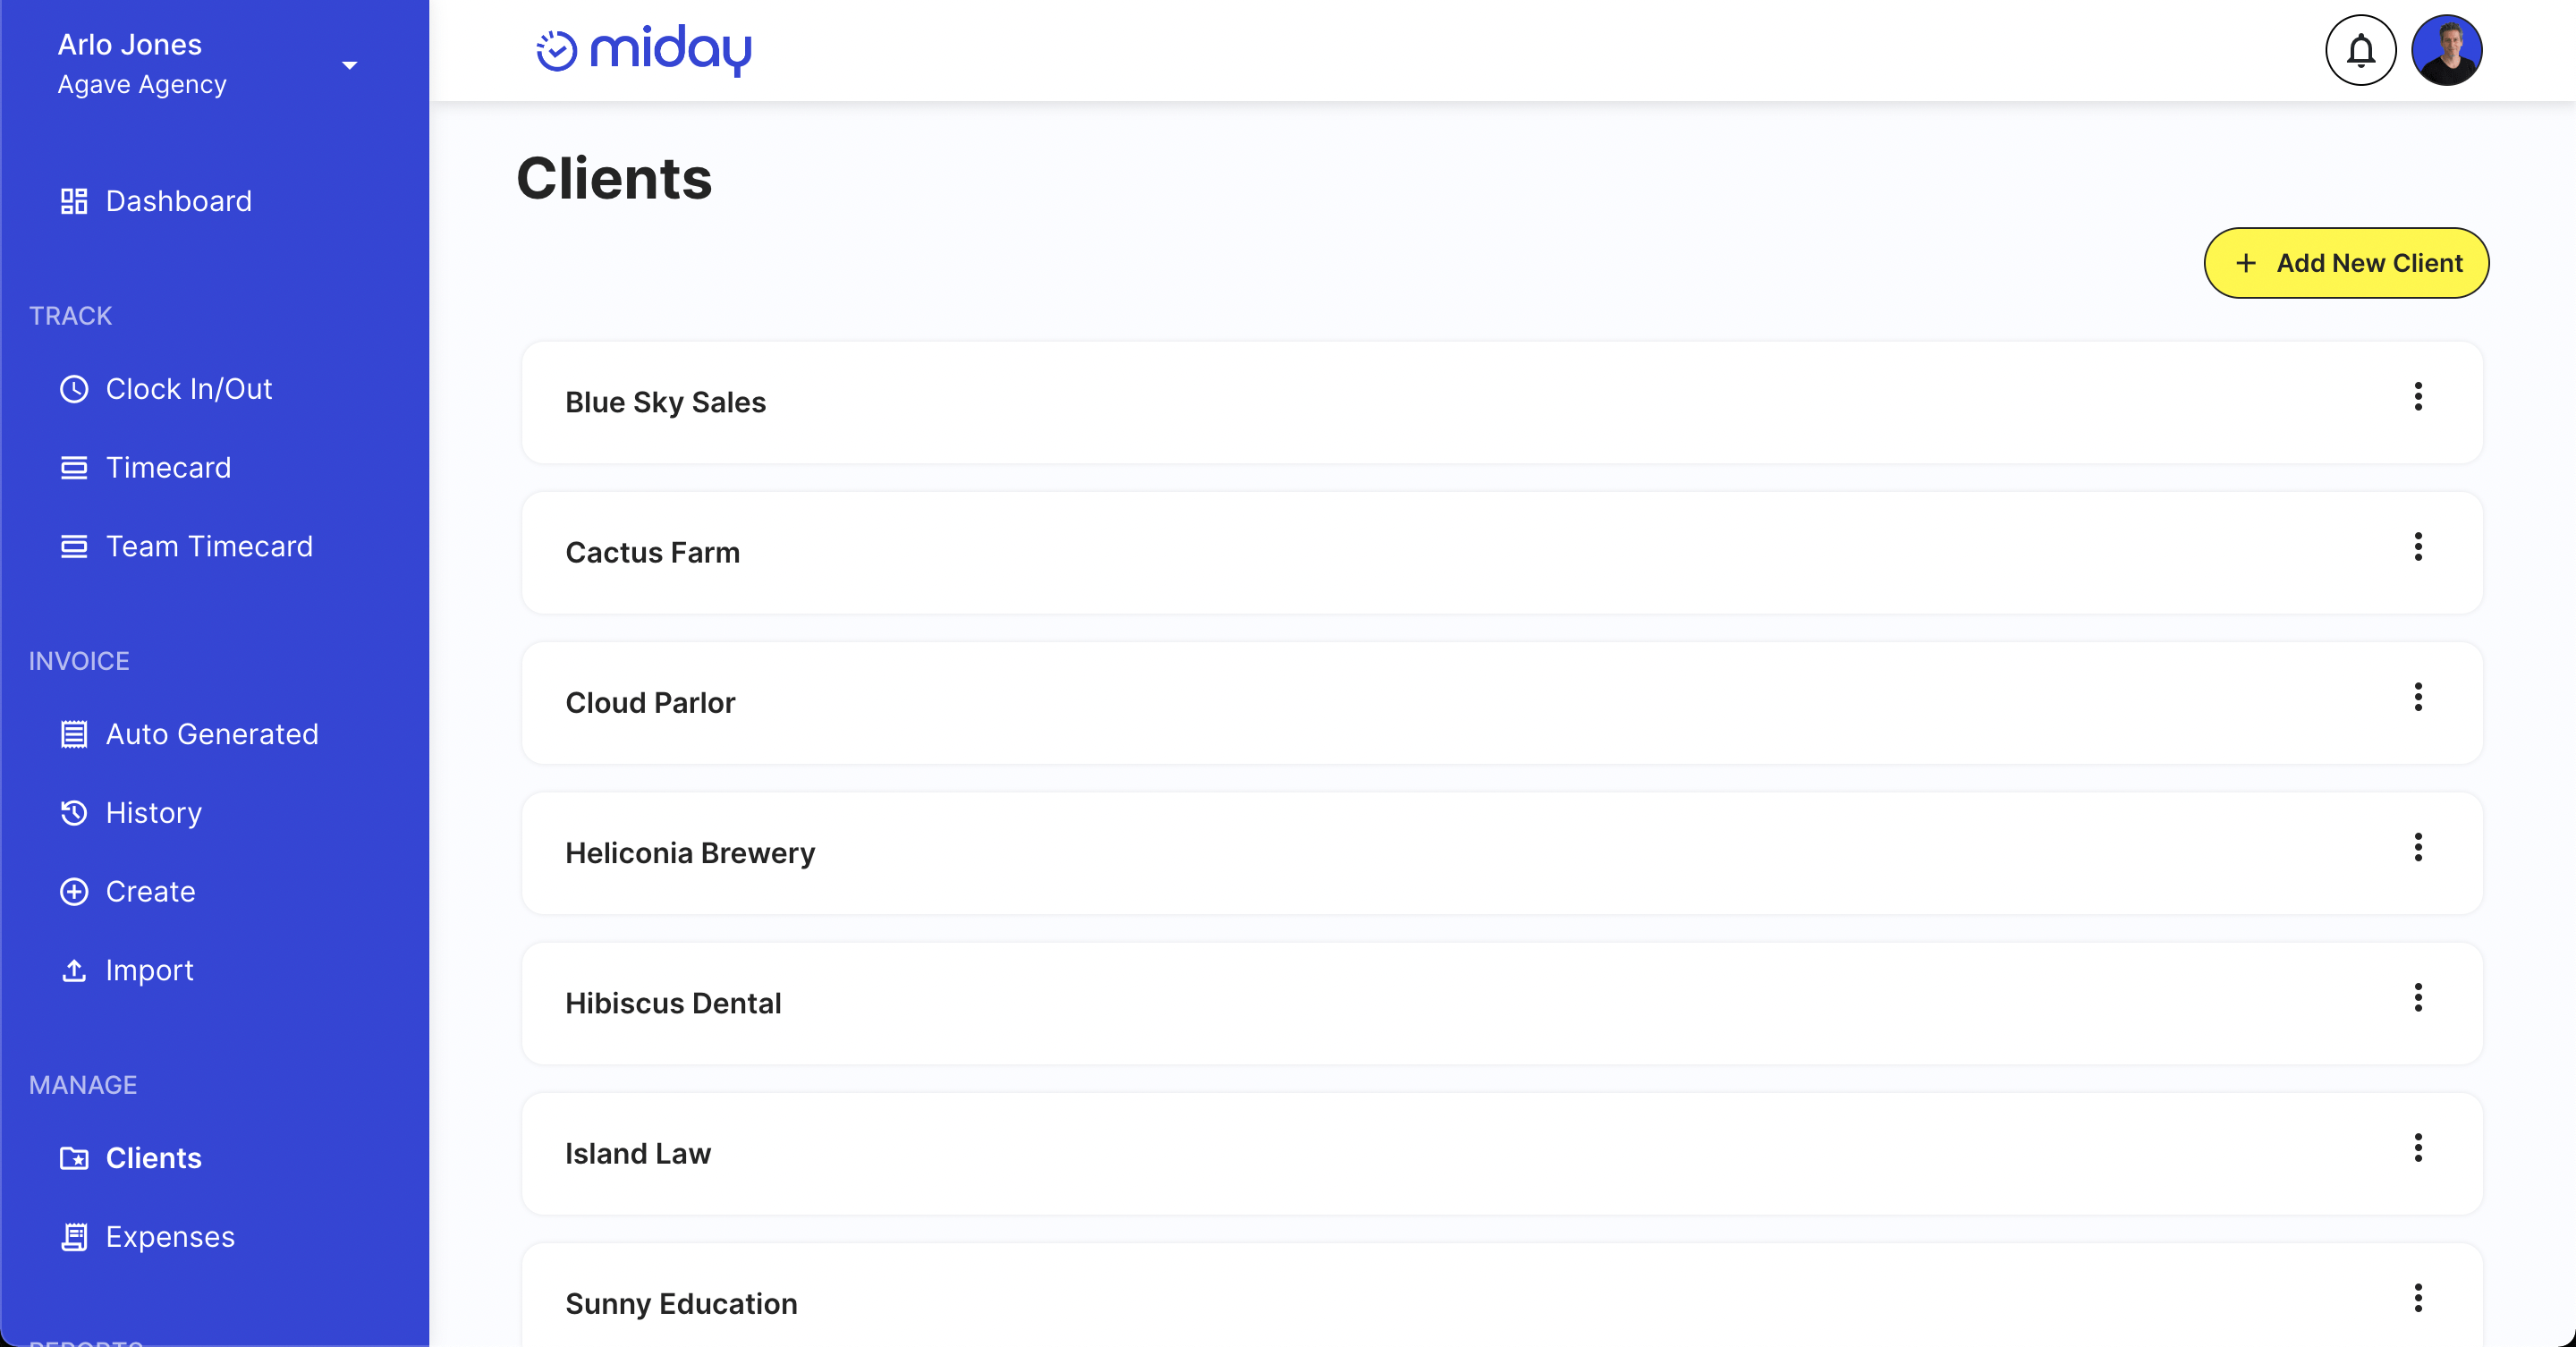
Adding a New Client
Creating a new client is easy with Miday. Head over to your “Clients” page, and press the “Add new client” button and you’ll be prompted to enter some information.
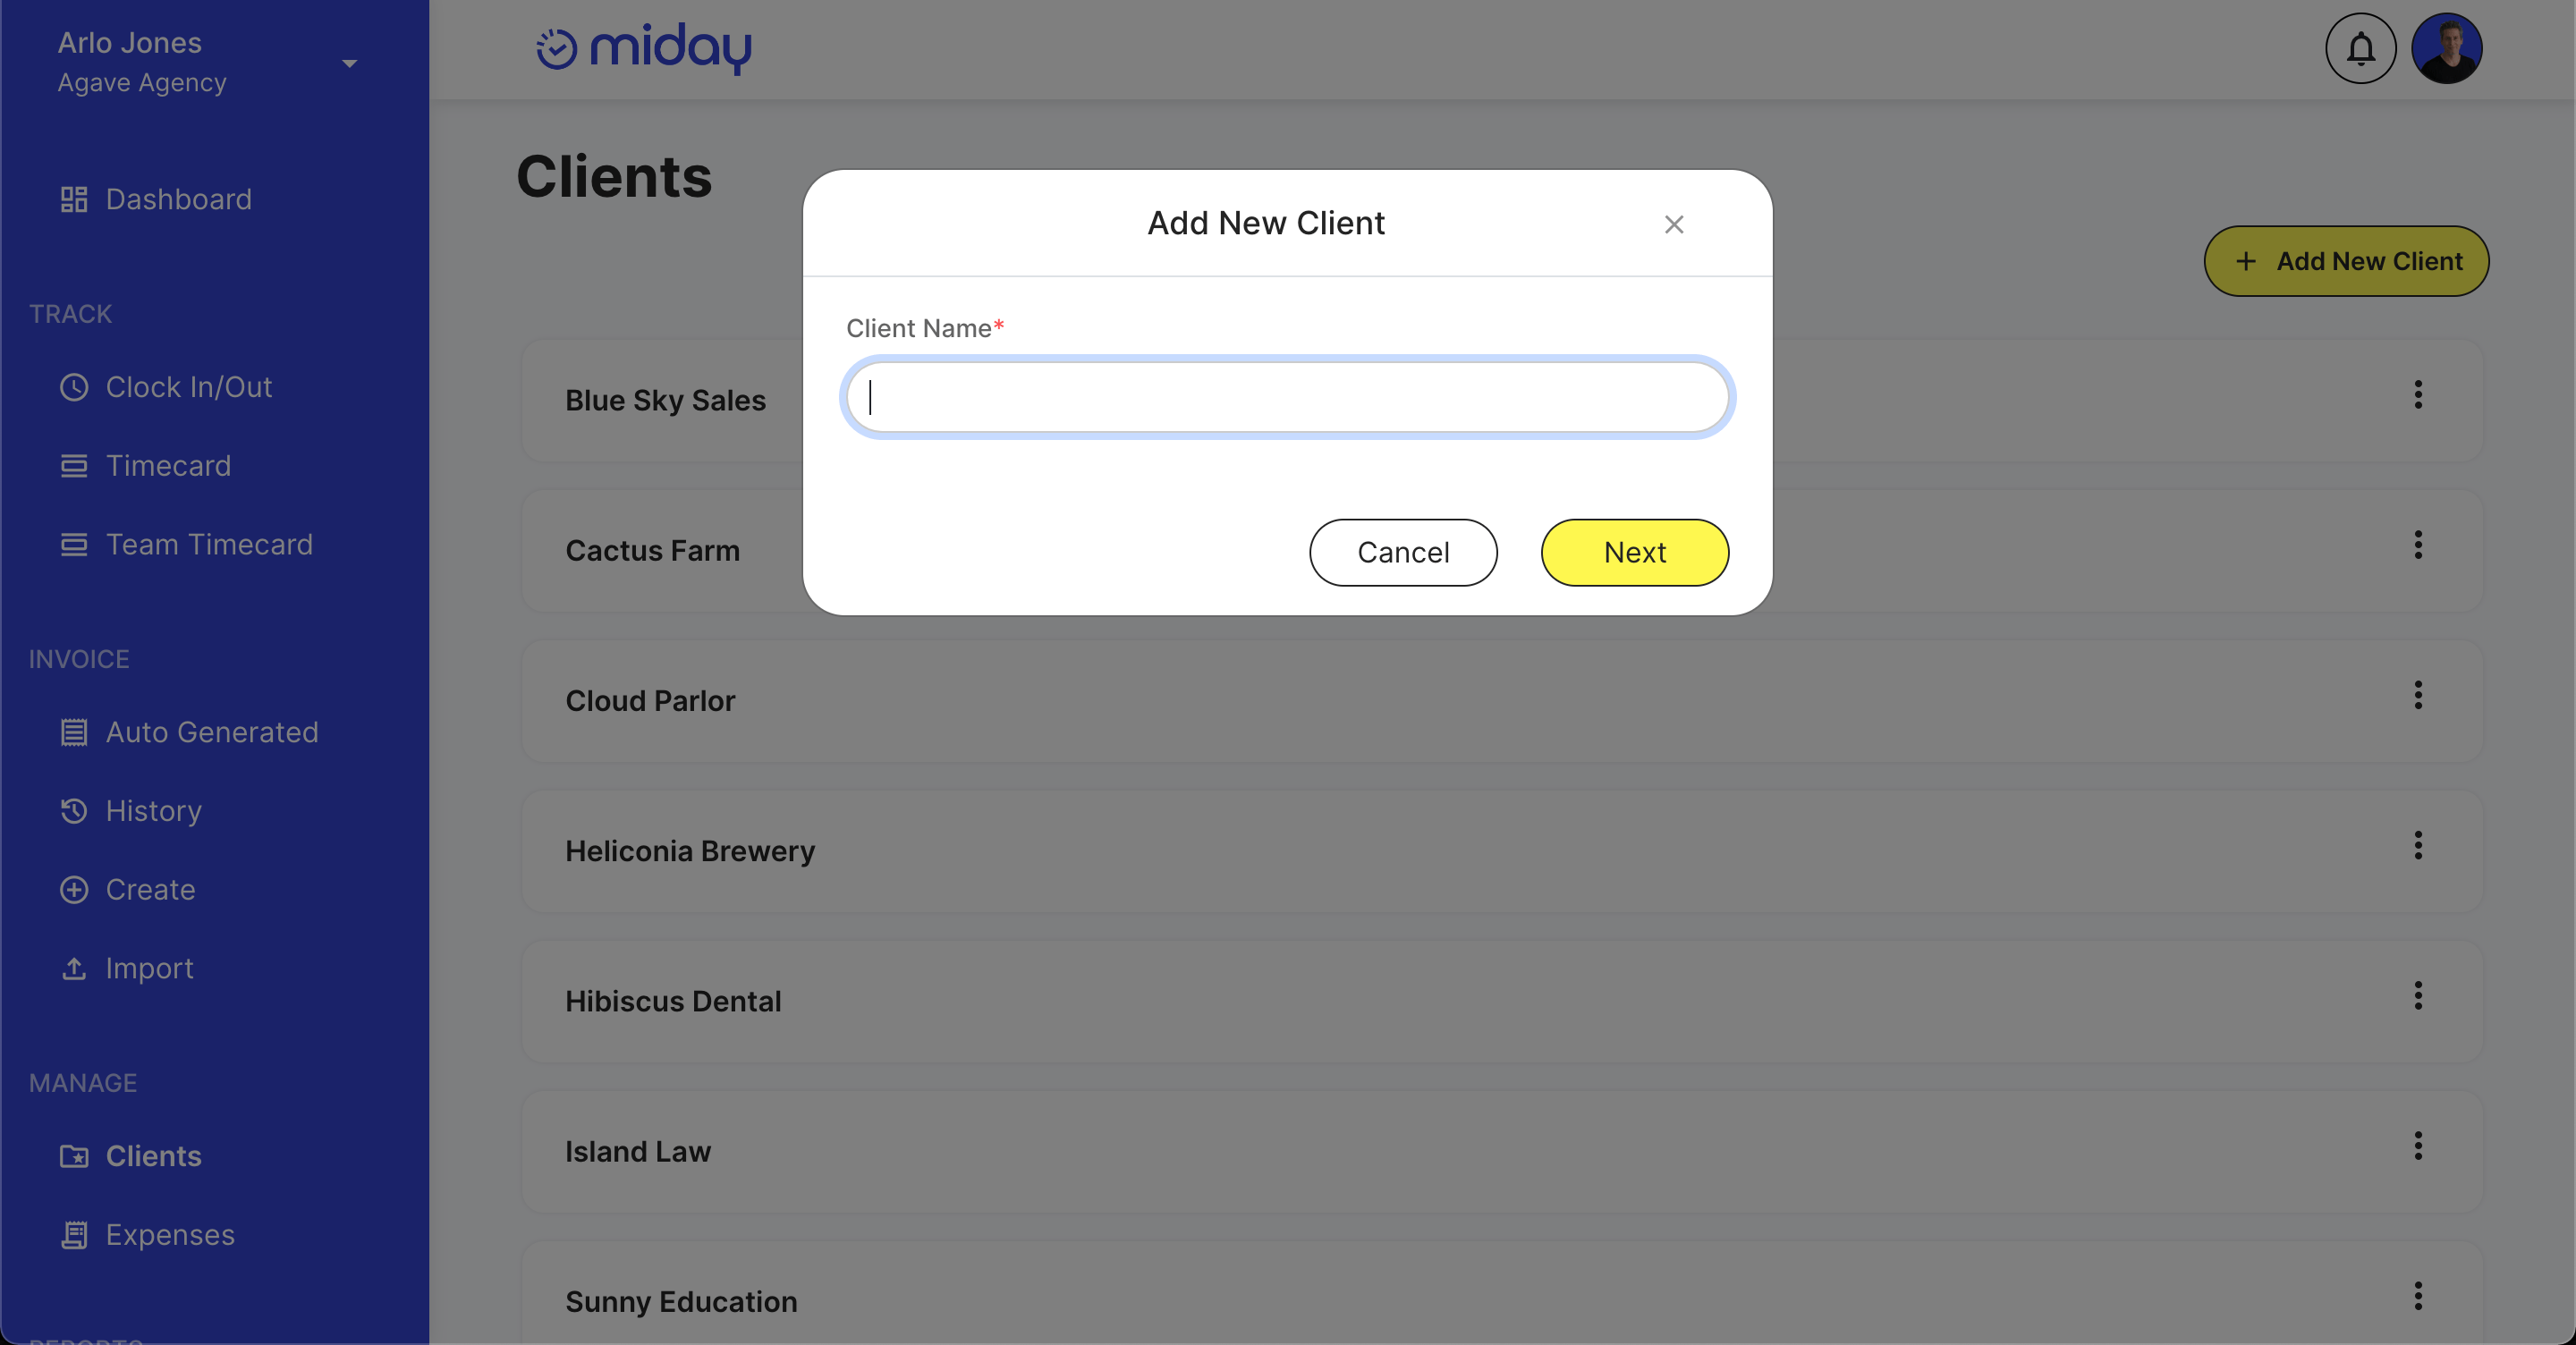
The Client Name
The first prompt will ask for the client’s name, this is the name that will be shown on invoices sent to the client. You can always change this later.
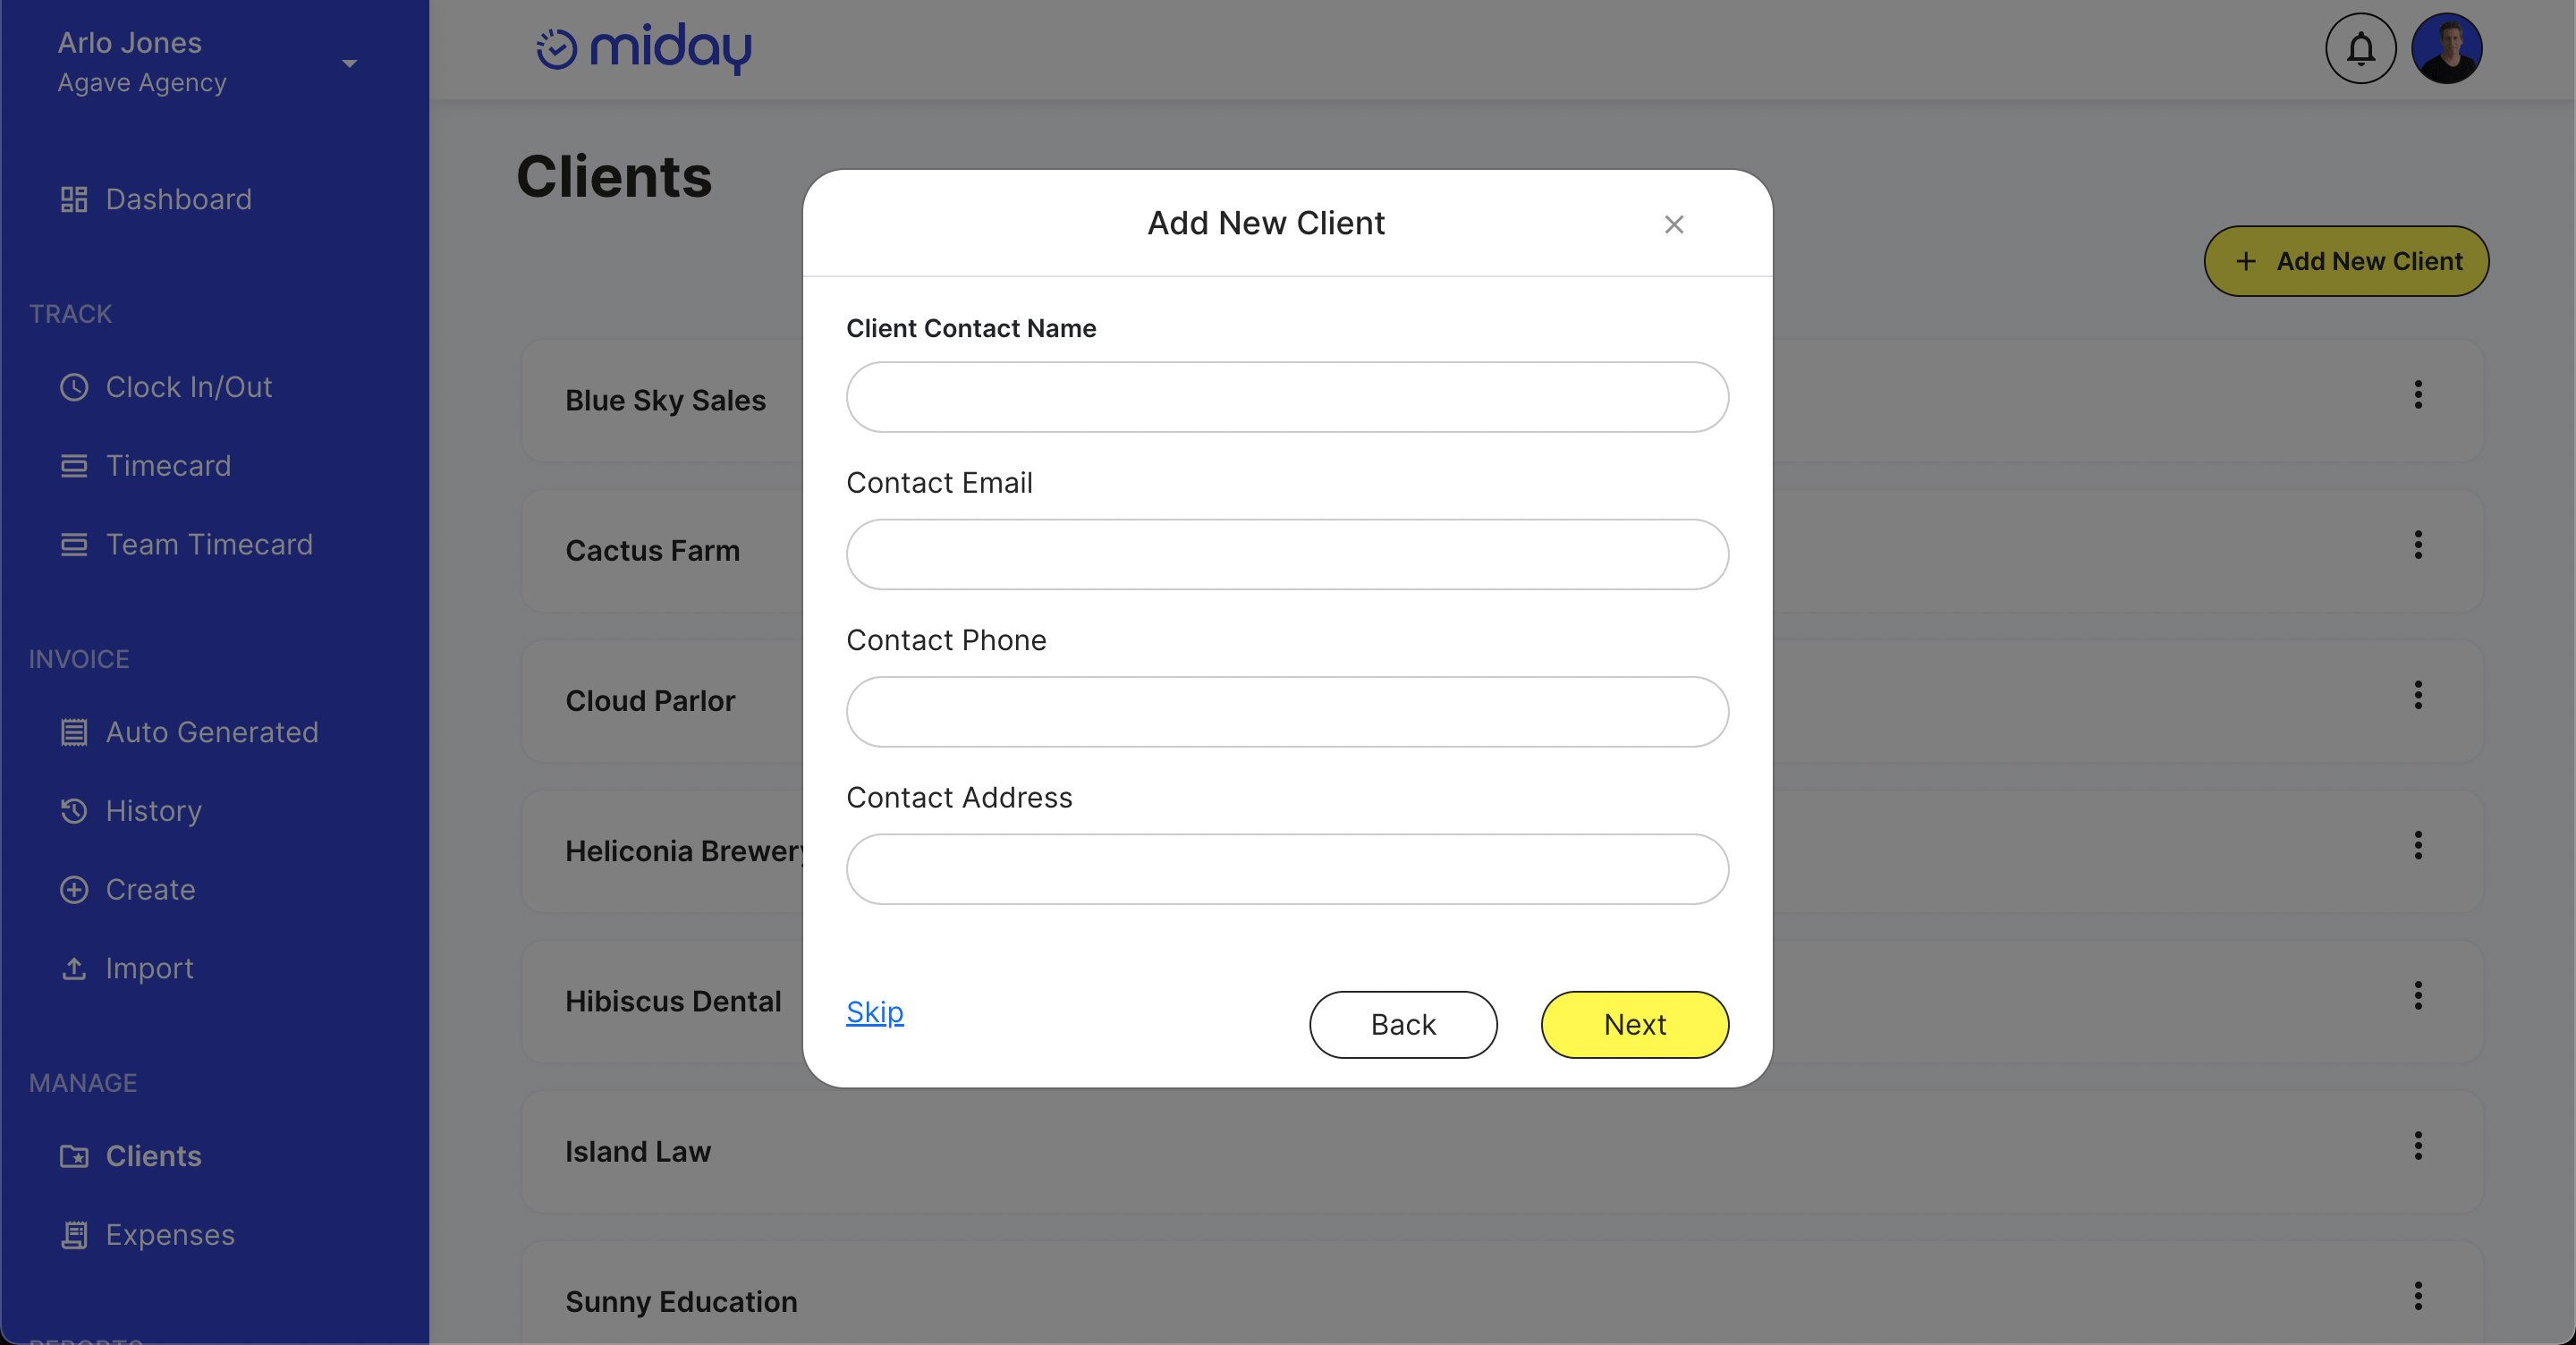
Client Details
The next prompt will ask for the client’s contact name, email, phone, and address. The contact name, email and address will appear on the invoices you send to the client. The phone number is for your own documentation. You can always change these later, or skip this prompt for now.
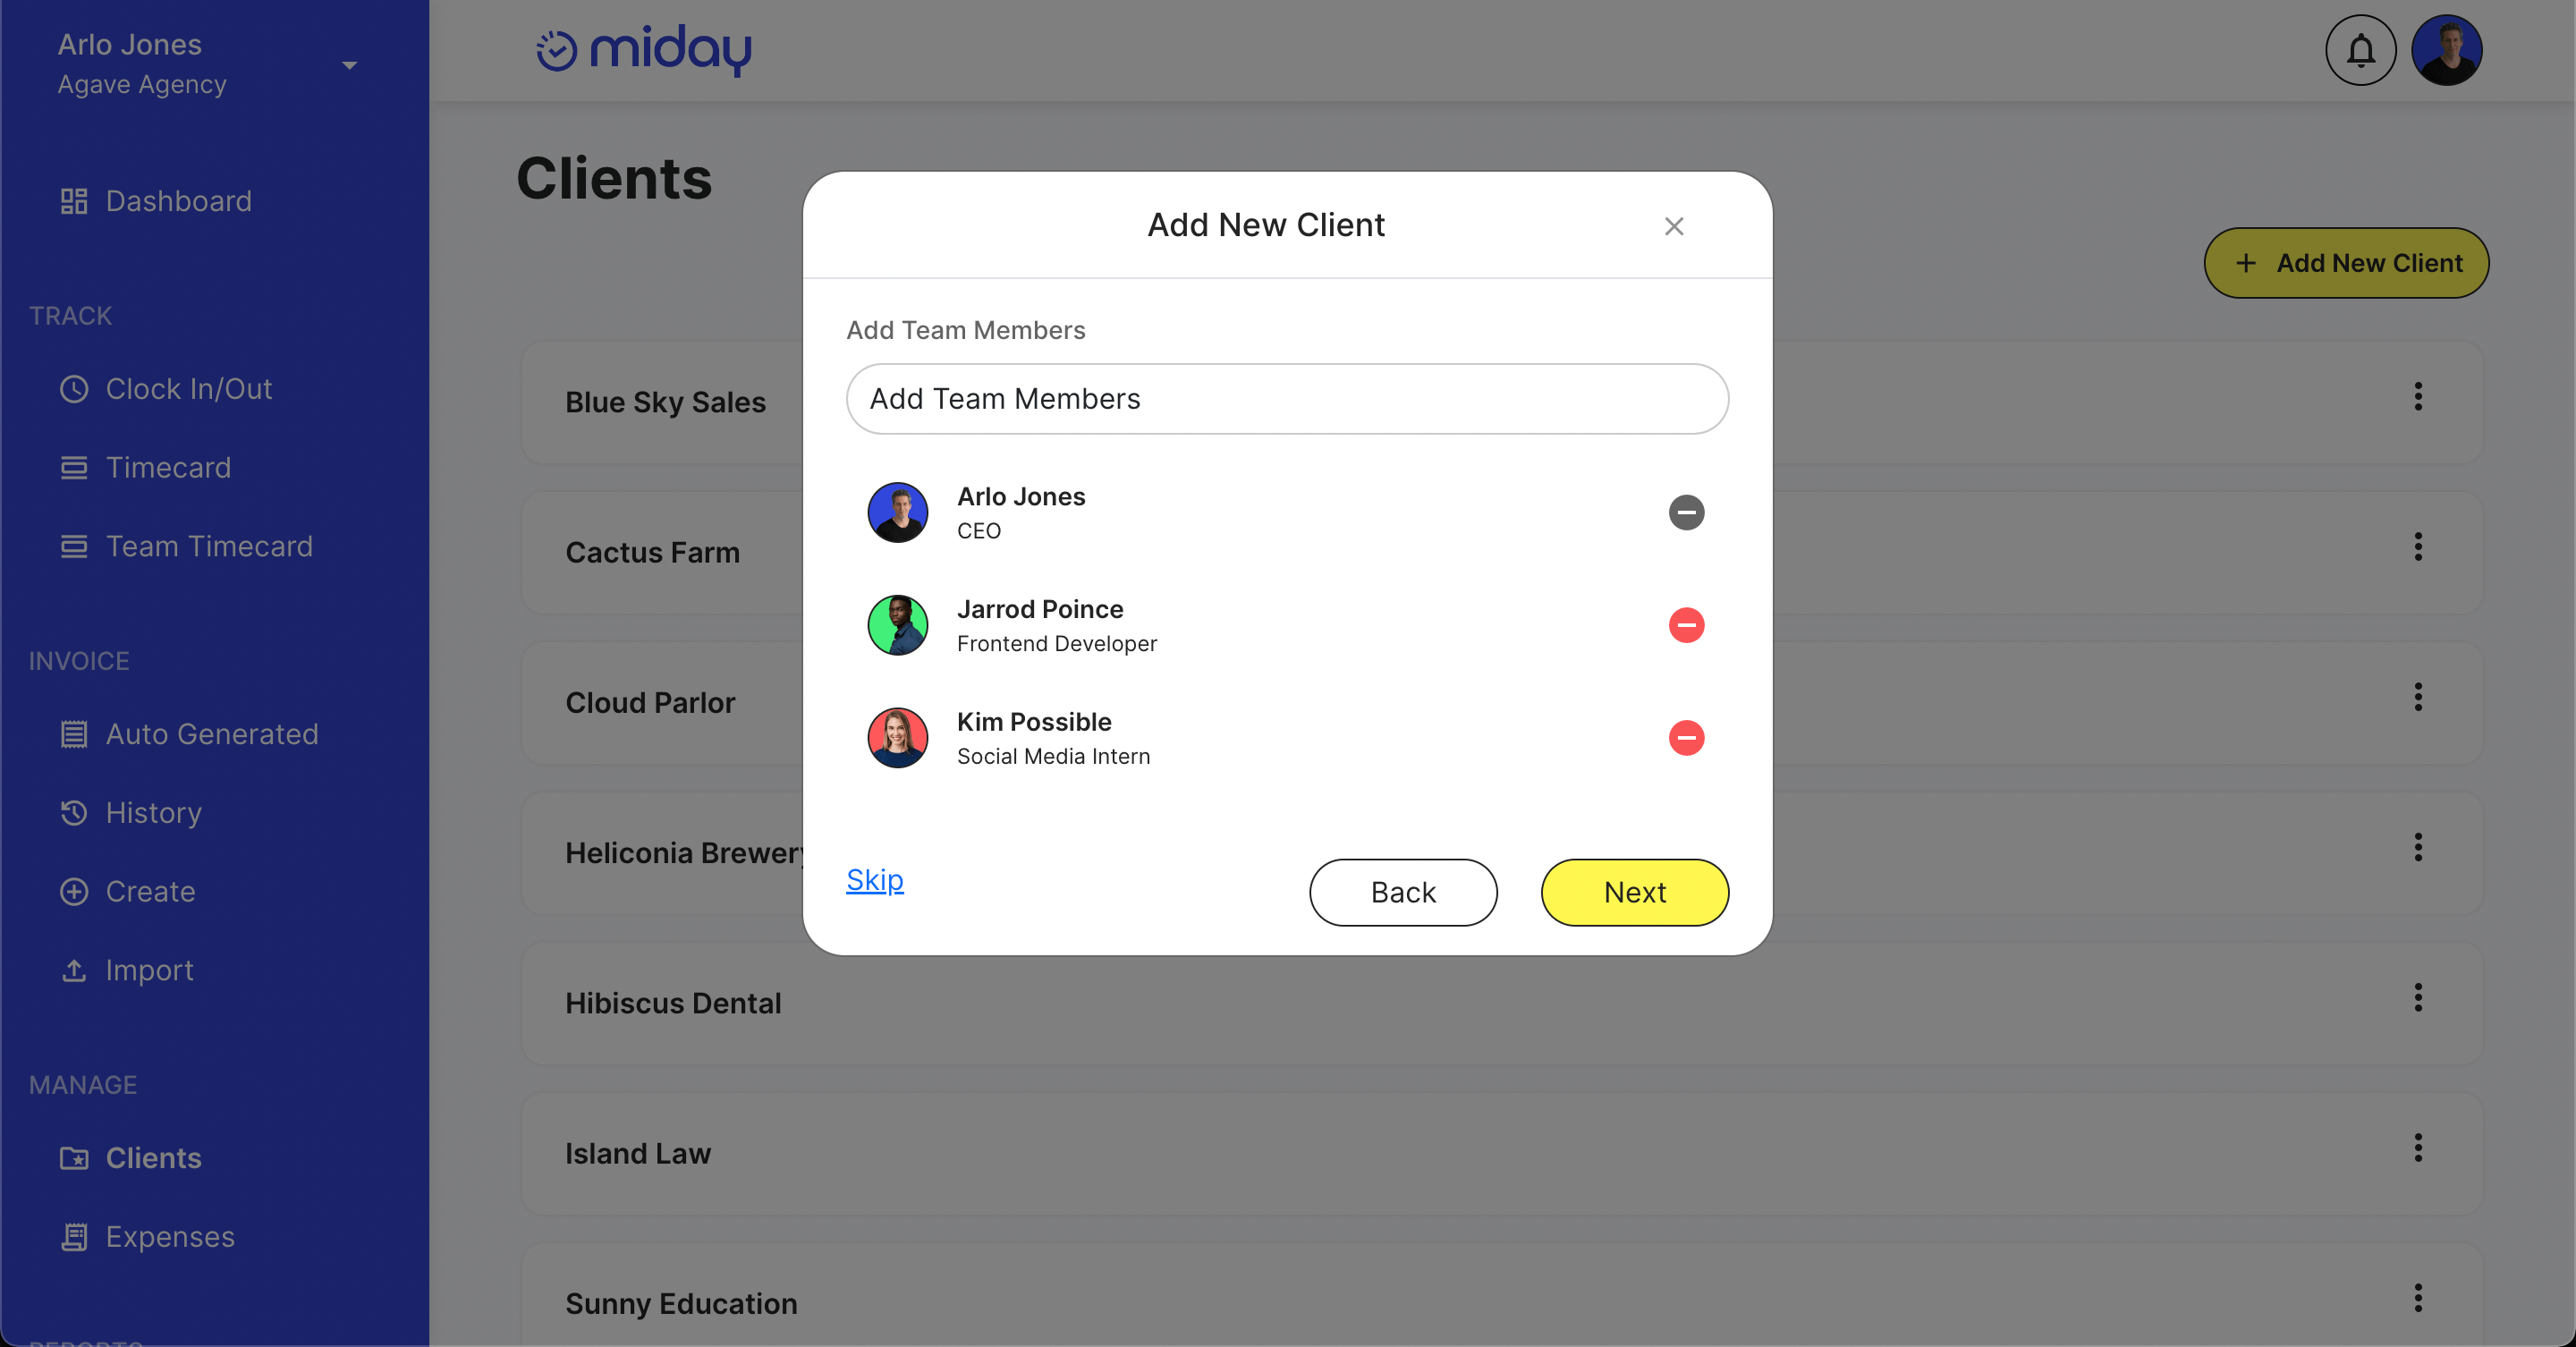
Adding Team Members
The next prompt will ask you to select the team members that will be working with this client. These are team members that are apart of your miday team. Team members that are added will be able to track their time and tasks for this client, otherwise they won’t see this client. You can always change this later, or skip this step for now.
Billing Type
The next prompt will ask you how you would like to bill this client. There are currently three options, 1. Bill by time. 2. Bill a flat rate. 3. Non-billable.
- Bill by time, this will generate invoices based on an hourly rate and will convert client tasks that a team member tacked with their time, into line items on generated invoices.
- Bill by a flat rate, this includes a one time fixed rate or a monthly recurring amount. This will automatically generate invoices based on your rate. You will be able to select how often you invoice later.
- Non-billable client, this means you don’t plan on invoicing this client and no invoices will be generated.

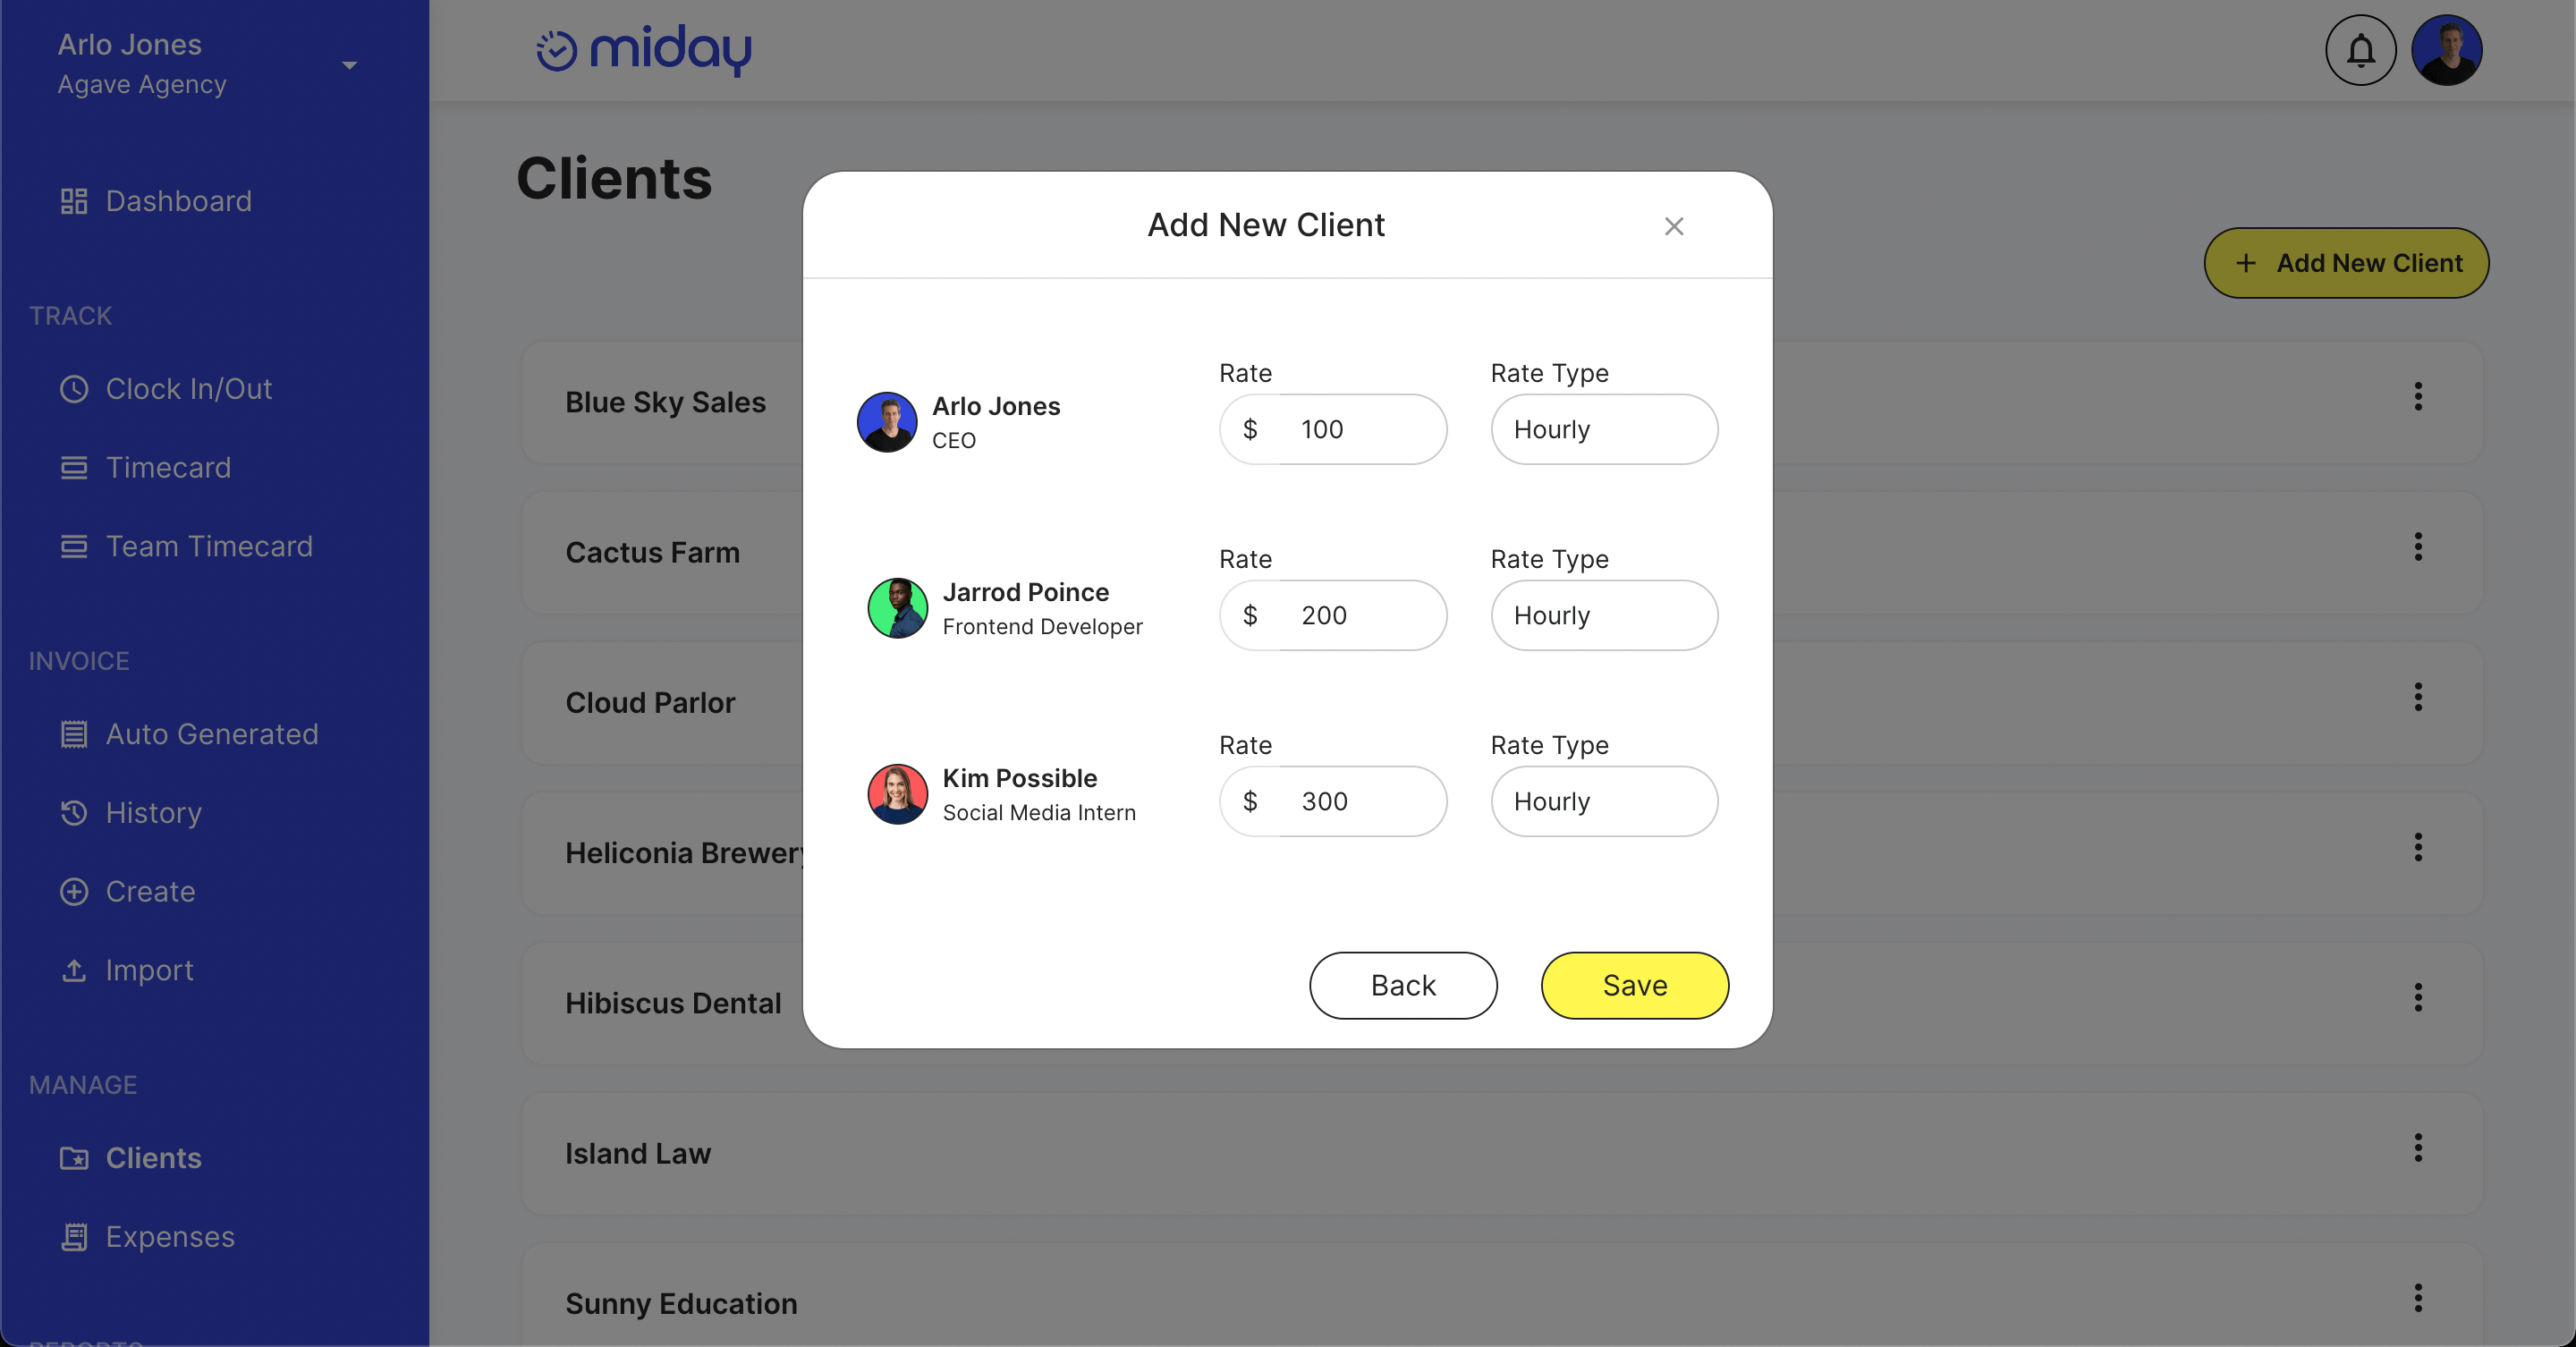
Bill by Time
If you’ve selected to bill this client by time, the next prompt will ask you to input a rate for each team member on this client. Typically each team member would have the same rate as the client has probably agreed to a single hourly rate with your company, but the flexibility of our system allows for different individual hourly rates or even a mix of hourly and monthly rates. These are not to be confused with hourly rates that you may be paying your employees or contractors.
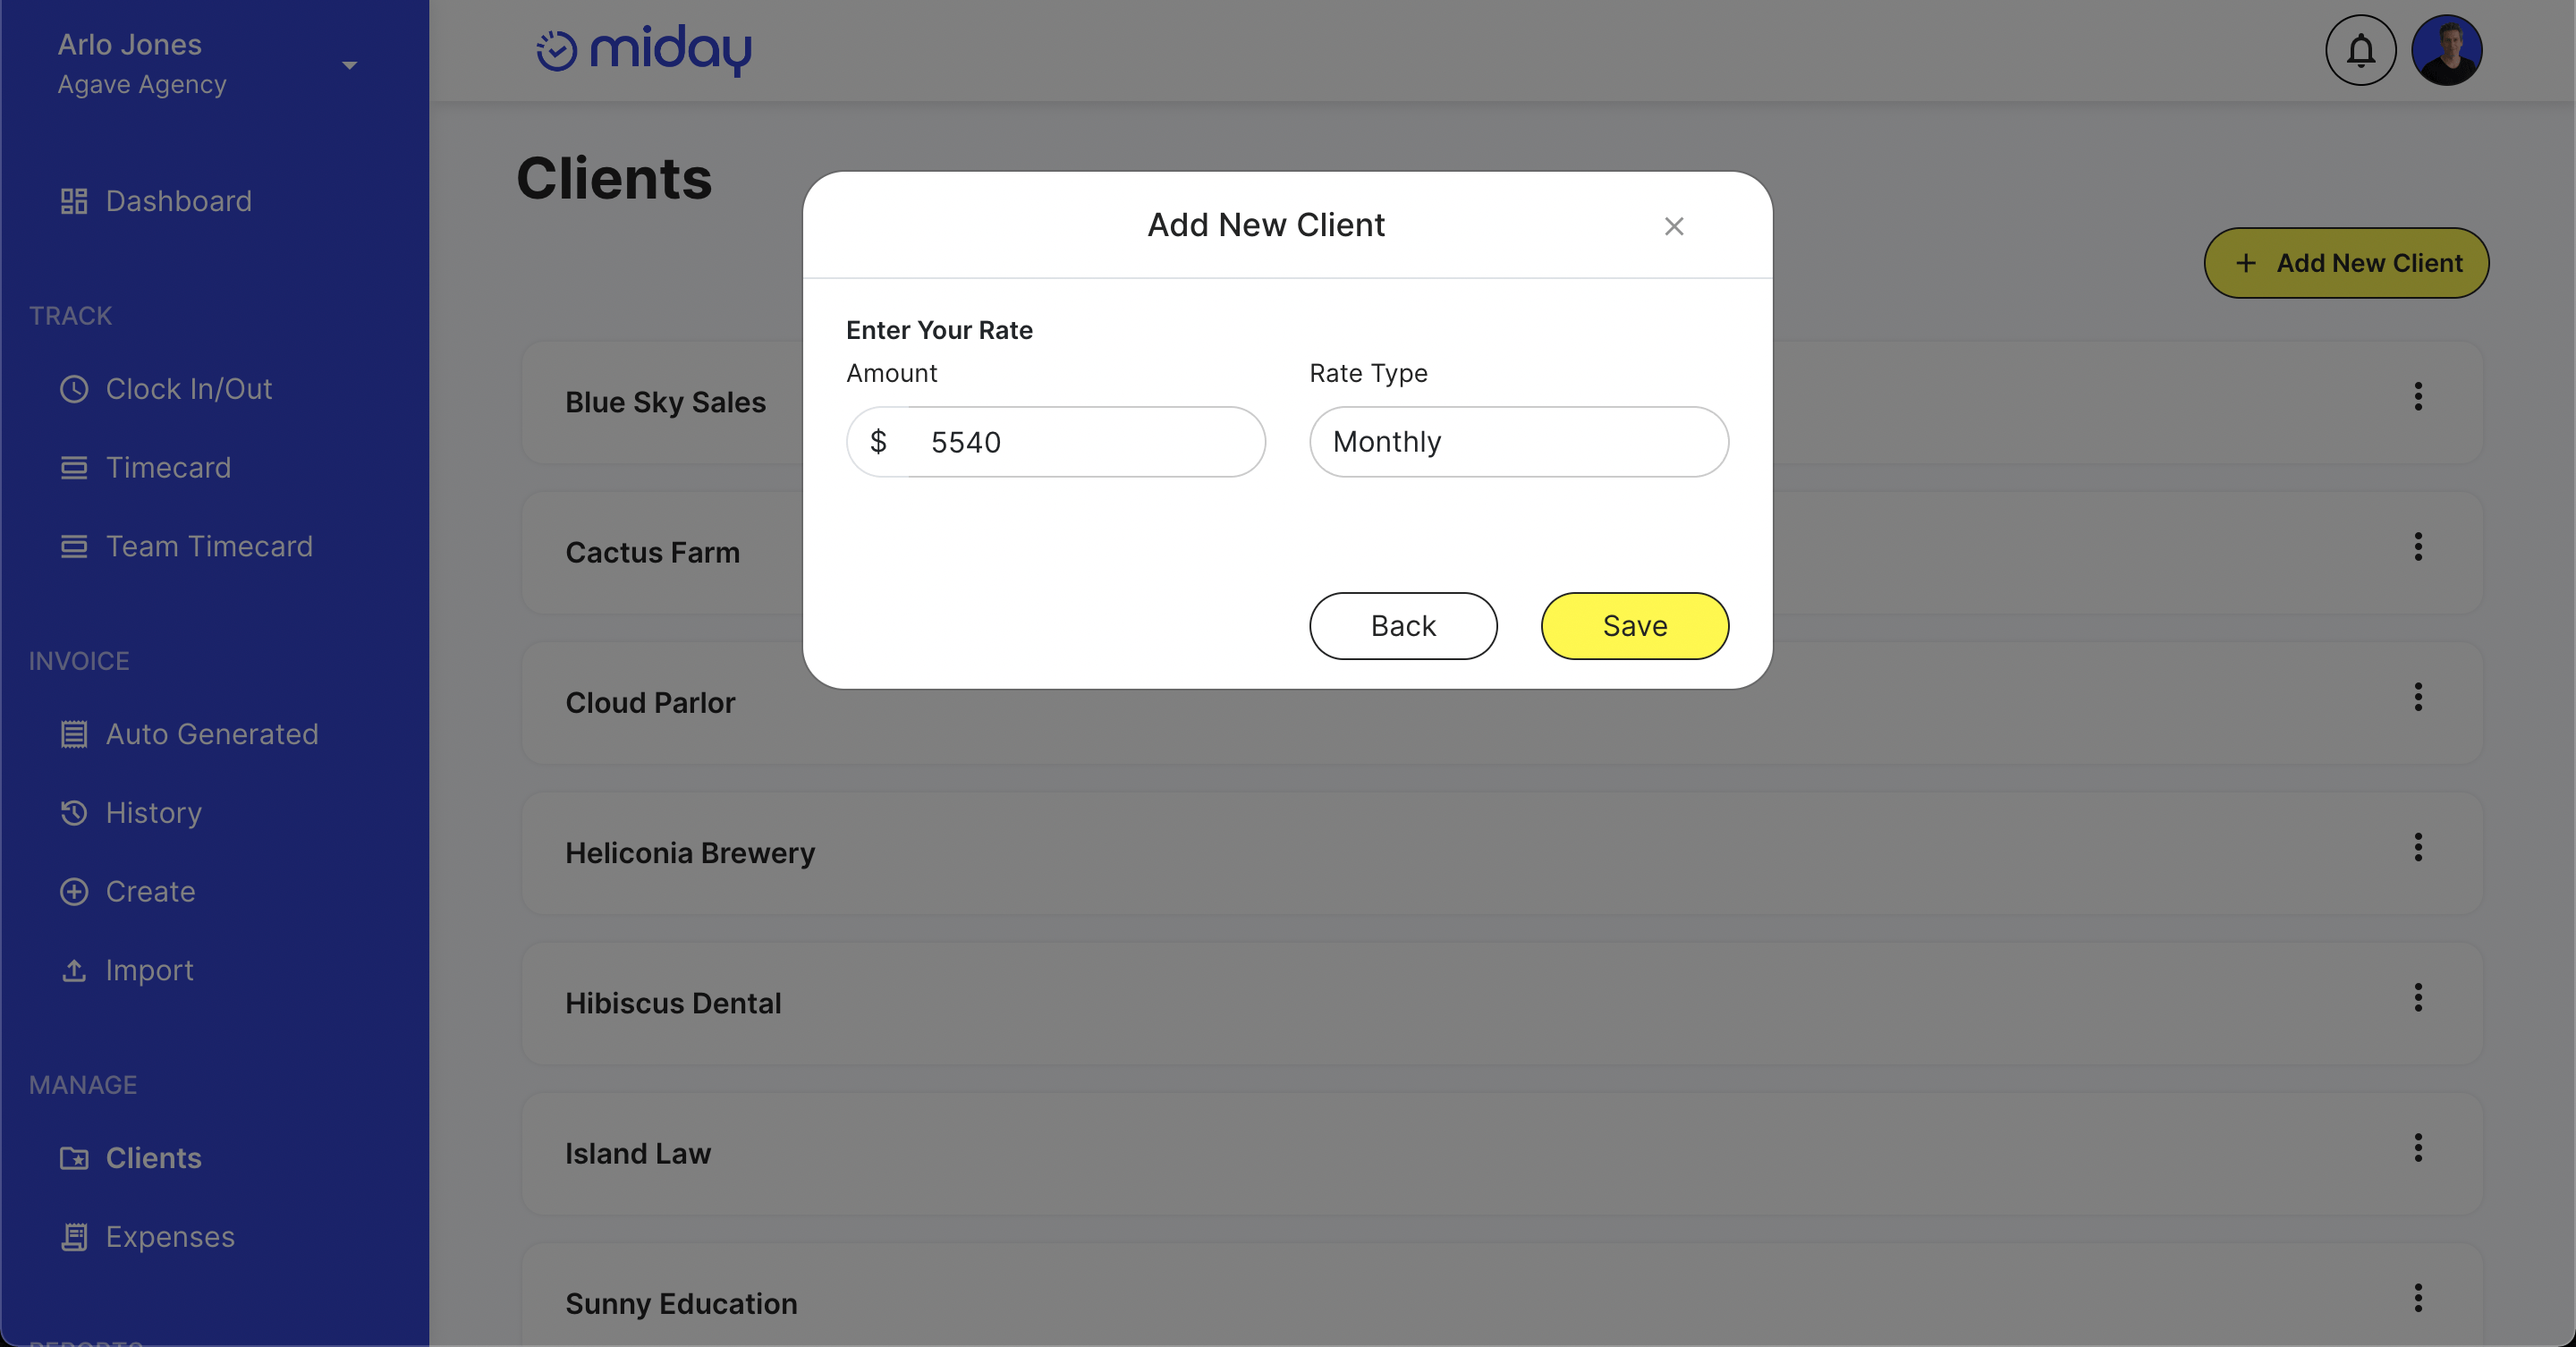
Bill by a Fixed Rate
If you’ve selected to bill this client by a fixed rate, the next prompt will ask you to input a single client-wide rate. You can enter a monthly recurring rate or a one time rate.
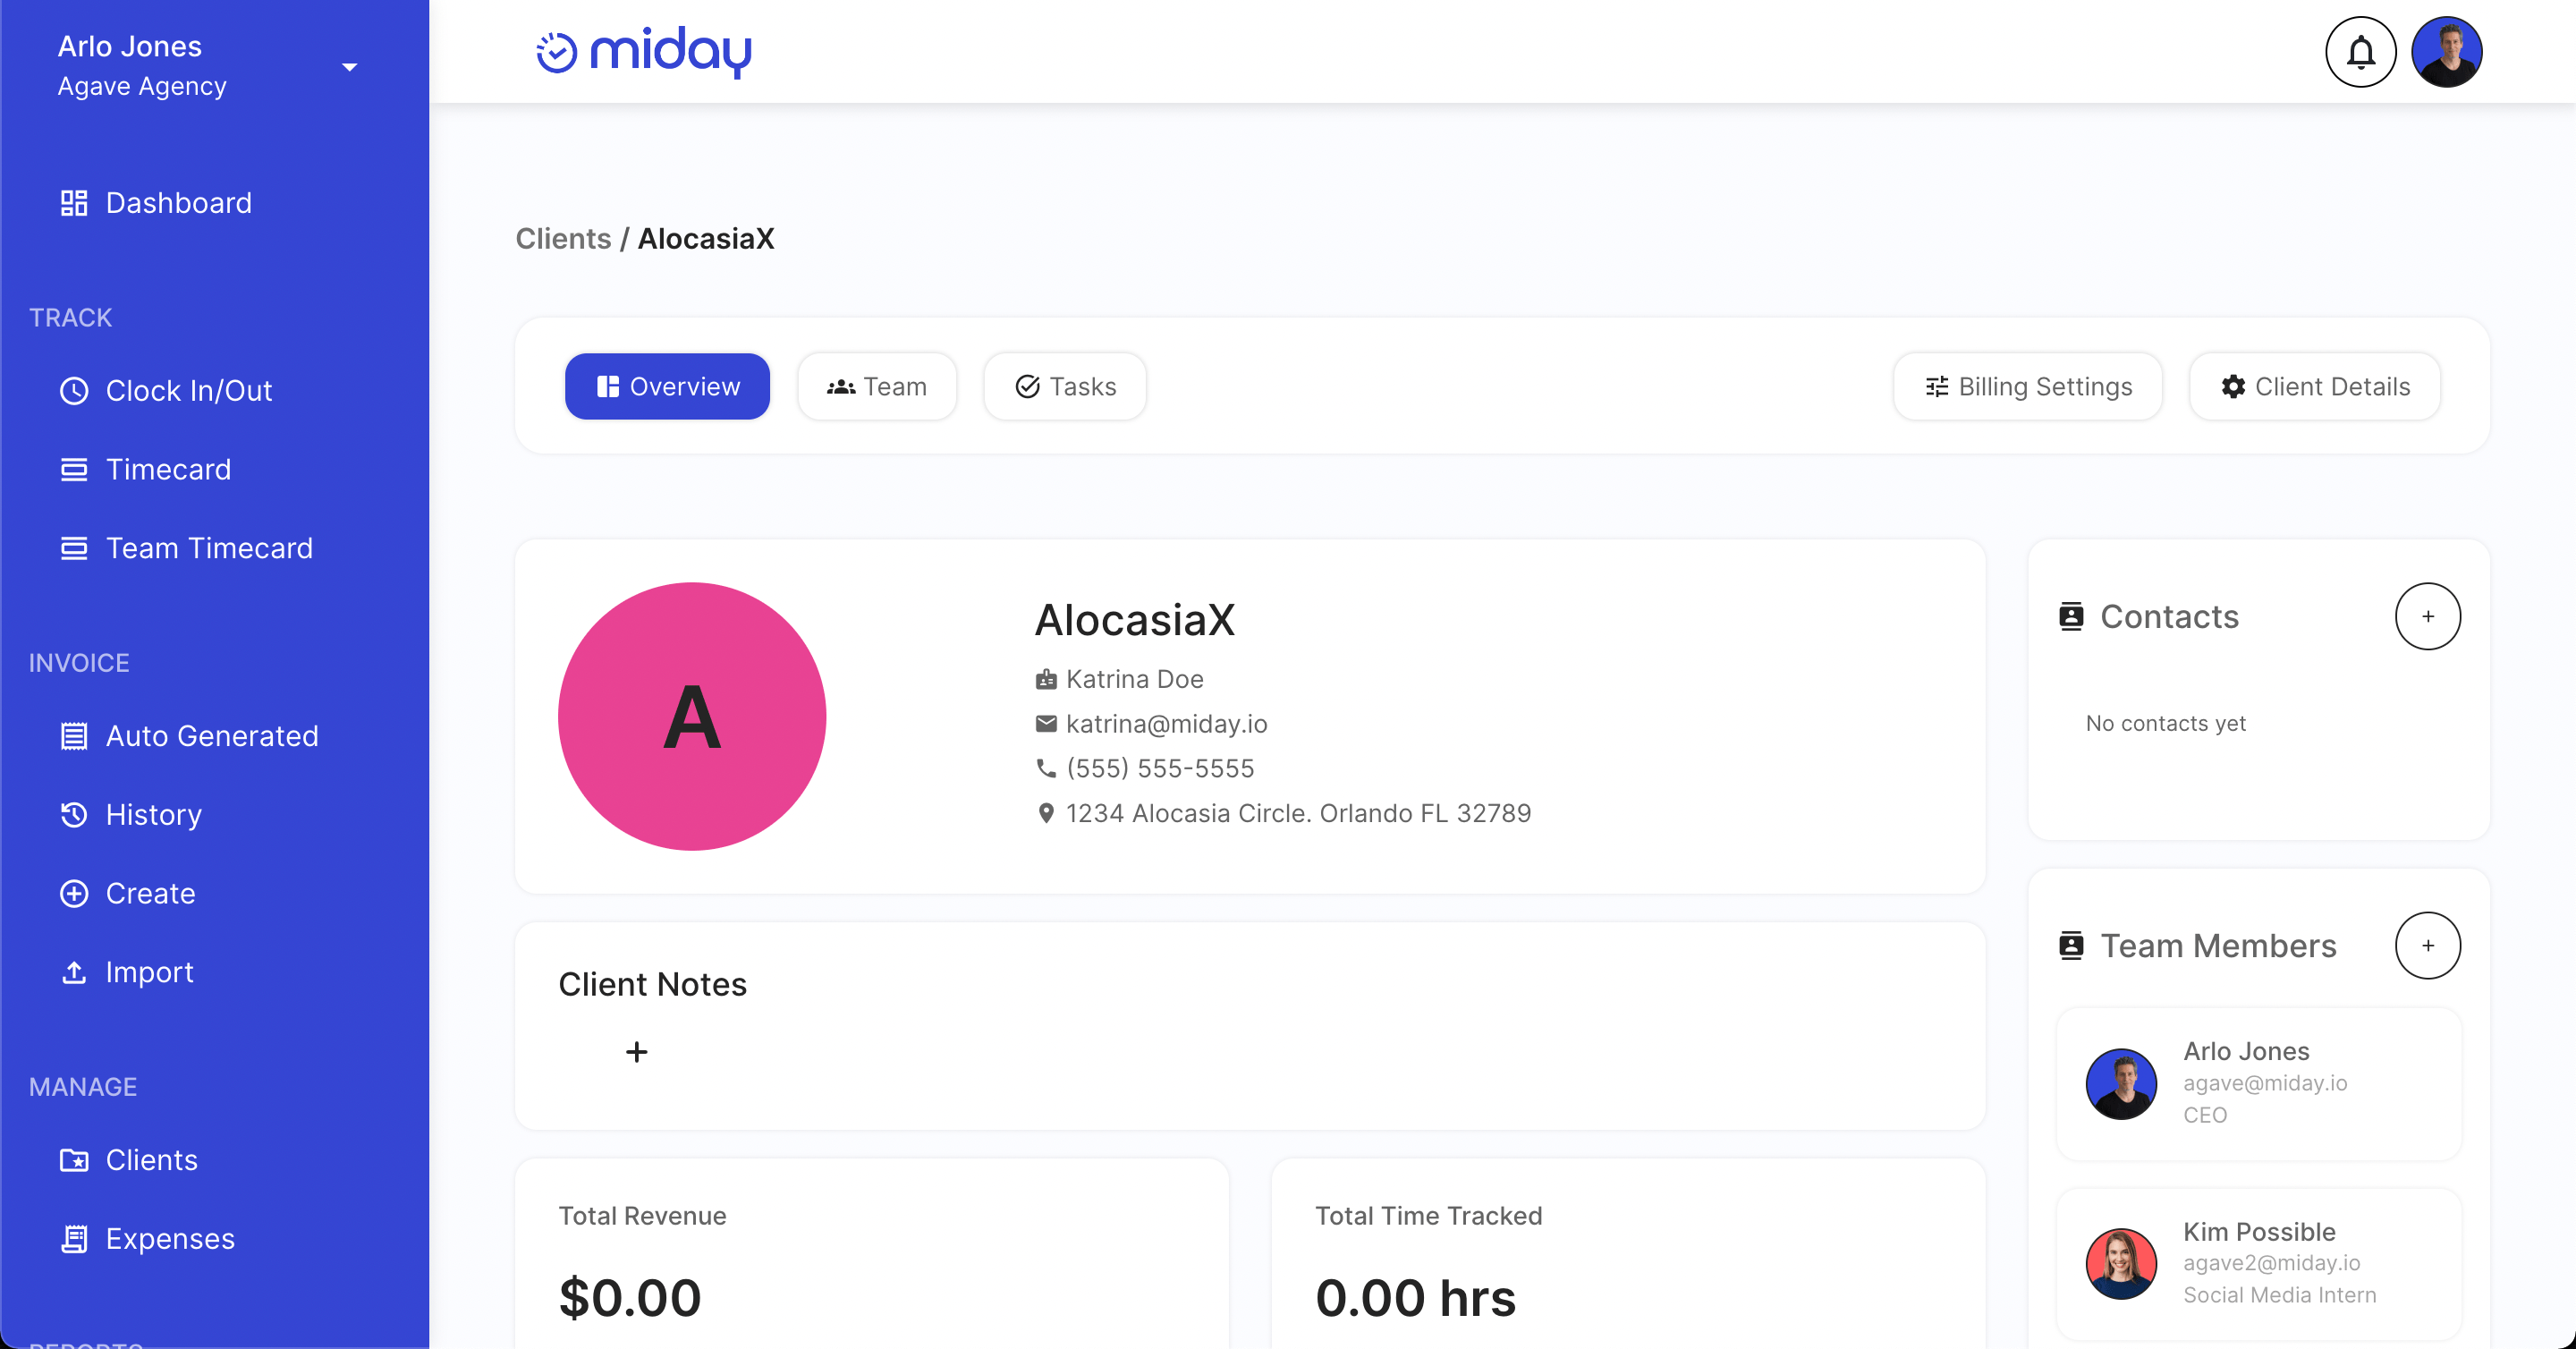
The Client Dashboard
After you’ve entered the information prompted above, you’ll be taken to your client’s miday dashboard. This dashboard serves as a centralized location to give you an overview of all activity with this client and to document important information on this client.
Start Tracking your Time
Now that you’ve created a client, you and your fellow team members (who were added to the client), can now clock in, add tasks, and track their time.
